Categories
Feature Post Marketing Tips

Our 3 Step Guide on How to Plan Your Marketing Budget

Anything from email newsletters to PPC campaigns will need a place in your marketing budget. As a marketing head, you need to ensure that your allocation for different expenses will match your campaign goals. After all, a successful marketing campaign is part of the core of what makes a thriving business. Before you can eat of the fruit of your team’s success, you need to know how to make a strategic marketing budget that answers your company’s brand recognition goals.

Breaking down your marketing budget

Setting your marketing budget will help you stay on track with your team’s limitations, including paying for the production of marketing collaterals and other logistical expenses. It also enables you to project long-term strategies and initiatives with the cost of these attempts in mind. This allows you to know the difference between extravagant and sustainable campaigns with a higher ROI.

Depending on your company’s size, industry, and revenue projections, your marketing budget will vary for every campaign. Additionally, you can expect your expected cost ceilings to increase during different times of the year. Generally, CMOs report that marketing efforts cost around 8% to 16% of your business’s total revenue.

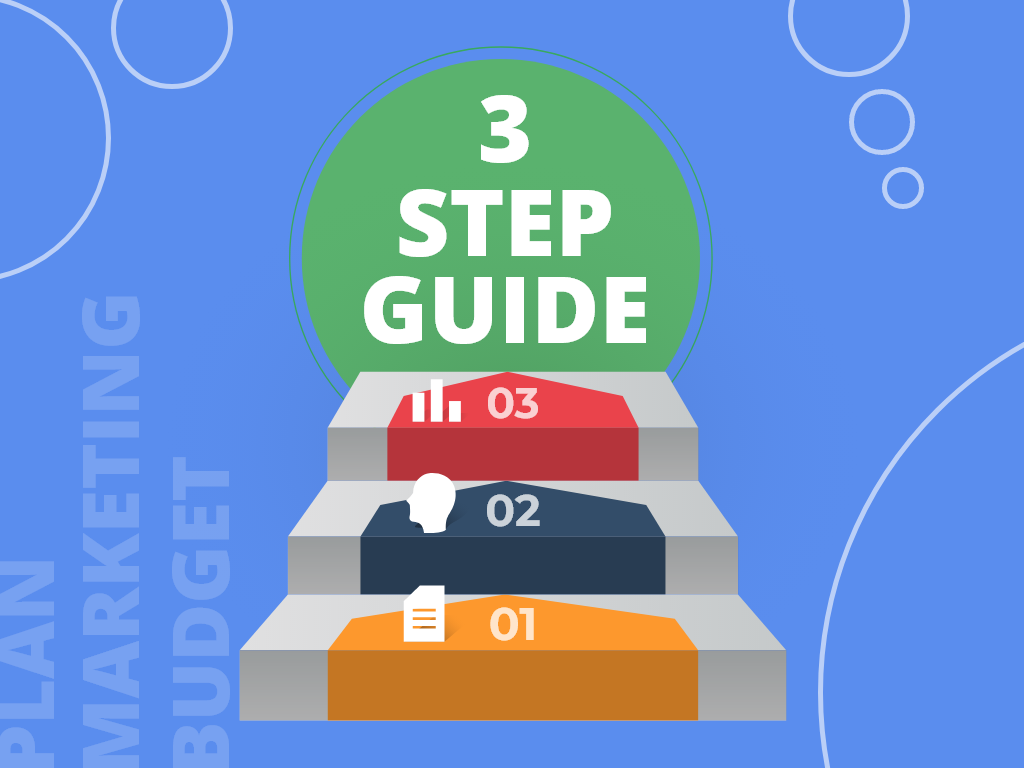
If you want to plan an airtight marketing budget, we will share a three-step guide to help you break down what you need to prepare for your company’s next budget proposal meeting.

Step #1: Calculating your marketing budget

There’s no universal format when it comes to managing your marketing budget. However, there are methods that marketing teams use as a template when goal setting and negotiating for their allotment for financials. Here are four common budgeting methods that can help you visualize your future marketing expenses:

1. Percent of revenue model: The simplest method is calculating a fixed percent of your company budget to your marketing team. The percent of revenue model prevents overspending and reduces the need for substantial research for budget forecasting. However, the problem now comes with how much budget you should allot.

Thankfully, there’s a general margin you can follow to estimate for your budget allocation. Businesses between 1-5 years of operation should use 12%-20% of revenue for marketing expenses. In contrast, companies operating beyond 5 years should cut down on their marketing considerably to 6%-12% since you should already have a higher customer base for organic marketing.

2. Project budget model: Your company can treat marketing campaigns as an individual project under its financials. If you have several campaigns in mind, you may need to break them down and determine your department’s final budget.

This method will work best for marketing teams that have an idea of their project’s specifics for the year. By working with tangible numbers, it’s easier to forecast expenses per fiscal quarter. However, you shouldn’t limit your projects solely on these figures. It can be dangerous to have a tunnel vision on a budget and not on your operational upkeep.

Remember that employee advancement budgets, office equipment, marketing software, venue reservations, and outsourcing creatives can balloon beyond your budget if you don’t account for them. Before submitting your project proposals, make sure that you consider these factors and remember to add an allowance for additional expenses.

3. Top-down model: Some businesses appoint finance officers in senior management to hand down the amount through a top-down budget approach. This can be limiting for marketing managers, especially since they don’t have control over the campaign budget. Instead of waiting for your senior officers, you can be proactive by submitting a mock marketing budget for your team’s needs.

Creating a comprehensive presentation of your campaign’s benefits, ROI, requests, and projected results will help your chances of getting approval from your senior officers. Doing so will highlight your initiative as a team leader and give you a higher chance of getting a green light on your projected expenses.

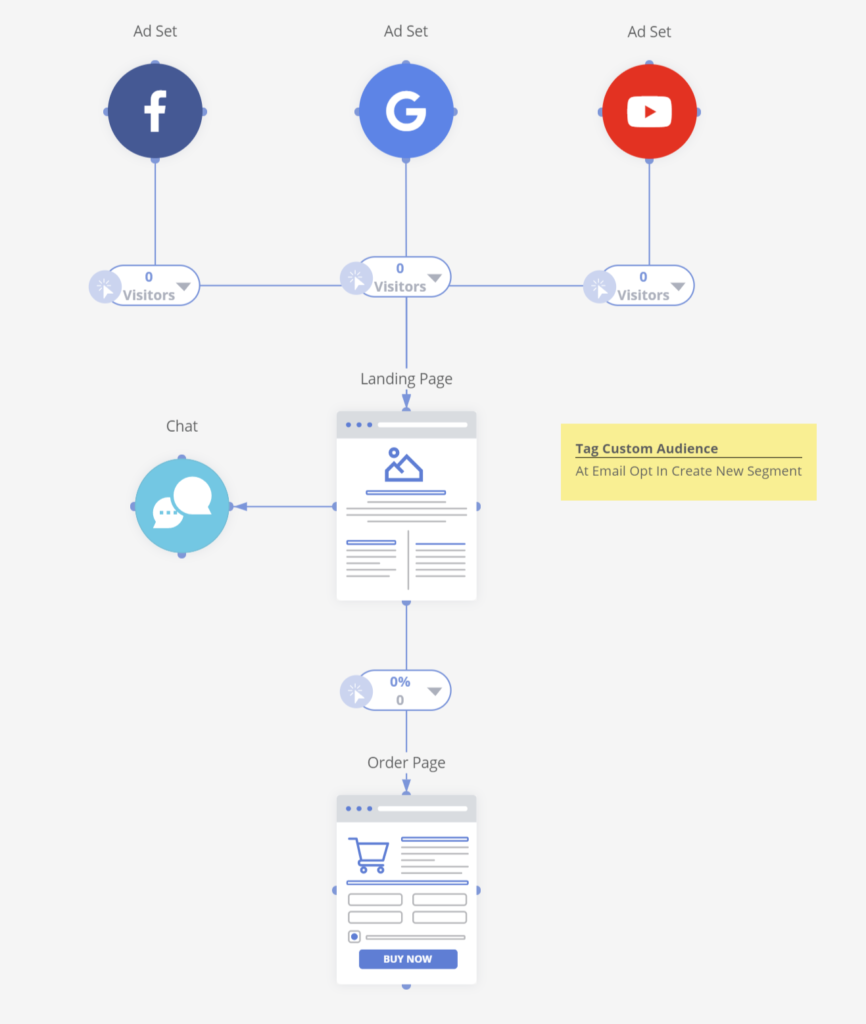
Many businesses use a funnel mapping tool to help their team keep track of their projected expenses. However, it’s important to note that these models should only work as a guide for your actual budget allocation. Learn when to adjust your actual budget from your previous projections when necessary.

Step #2: List out your different marketing functions and other expenses

Allocating your budget will depend on your key marketing functions. The larger the department you have, the more divisions you may need to appoint. Before you start prioritizing which team should have a larger cut over the other, you should first list out what you need to account for.

Branding and design, PR, and market research are the three core marketing functions that are important invest in. However, with more people moving online with their businesses, you may need to expand your marketing efforts. Digital marketing expenses can break down into different sectors, from content marketing to social media marketing. Additionally, you shouldn’t forget to include SEO in all your posts.

Besides these long-term functions, you should also consider if you will need to pay for your brand’s one-time expenses. You may need to allot some of your budget for logistical and design costs if you plan to have product launches and website redesigns.

Step #3: Allocate your funds to high ROI marketing channels

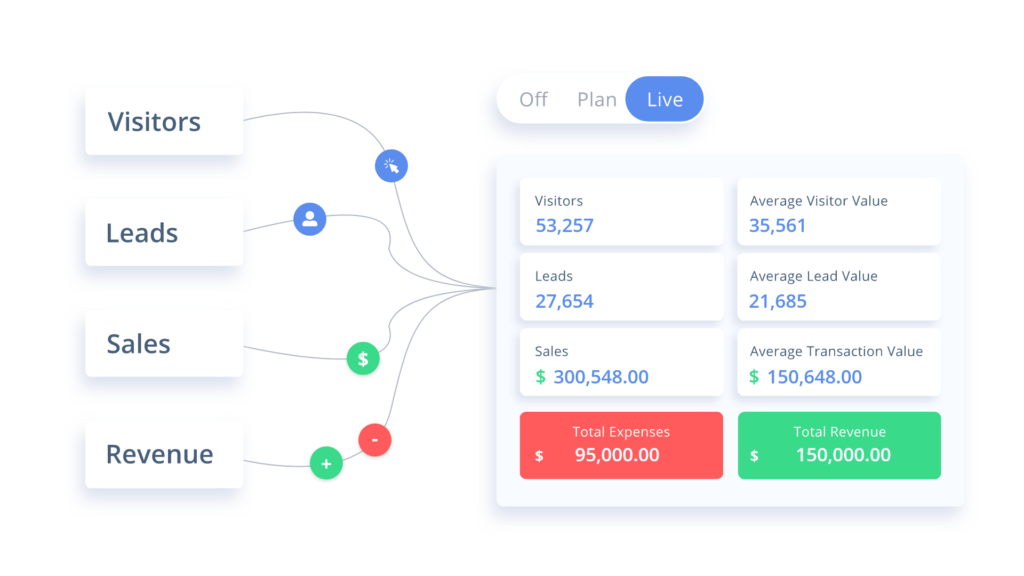
Spending money to make money is the core principle of marketing. As your brand’s recognition expands, higher sales figures should logically follow. However, not all businesses will receive the same amount of success in their marketing efforts. This is because their ROI doesn’t offer a positive net worth of revenue.

A growing business can use an attribution model to set the criteria for which marketing efforts generate the best leads. This is important for marketers to know if campaigns are effective. If you don’t have enough market research available, you should try emulating successful businesses in the same industry. Learn from your competitors’ marketing developments and try to avoid their mistakes.

You can start with a general allocation for as many marketing channels as possible. Although it can be tempting to put all your budget on one campaign strategy, it will be a substantial financial risk. Also, it results in fewer data to interpret for revising your future campaigns.

Through recommendations and input from customers and team collaborators, you can refine and adjust your budgeting to prioritize the channels and networks with the highest ROI. Simultaneously, you can reduce the financing or cancel altogether the sales funnel entryways that don’t offer a substantial growth to your customer conversion rates.

Conclusion

It’s your responsibility as a marketing team head to know the ins and outs of your company’s marketing plans. This includes your understanding of how budgeting can help you deliver the best results for your business’s success. With the help of reliable teammates and the right marketing budgeting software, your marketing campaign’s success is only a stone’s throw away.

The best way to ensure your marketing campaign’s efficiency and precision is to use the latest digital tools available. We provide comprehensive marketing collaboration tools to help your team execute a successful marketing campaign.

Sign up for the free plan today and see how our marketing plan software can lead your business to success!

Categories
Latest Posts Marketing Tips

10 Ways Social Proof Adds Value to Your Marketing Funnel

When you build a business, you will eventually reach the point when you cannot give potential customers an in-person sales pitch. As a business owner, you have to ensure that you highlight what makes your products great even if you’re not in front of people to do this. 

One way to do this is by showing social proof—offering evidence of past clients being satisfied with your offerings and finding value in them. When you do your funnel mapping and tracking, you should include instances where you can incorporate social proof.

Here are some ideas to consider.

1. Show written or video testimonials

If a customer has written to you telling you how much they loved your product, you can show this as a featured quote in your sales funnel. Secure permission to show their note; you don’t want a satisfied customer to turn into an angry one! Also, check with them if they are okay with their real name and photo being next to the quote. 

For the more tech-savvy, a video testimonial could be a better option. Video conveys more authenticity since an actual person is saying in their own words how your product has helped them. Testimonial videos are best for order forms, sales pages, or places people decide to click ‘Buy.’

2. Display case studies on your page

Testimonials only have one customer vouching for your product. To show quantitative proof of your product’s effectiveness, you should have a case study on your website. Case studies go more in-depth into discussions of outcomes and could show readers the process you took to achieve results. A case study does not even need to in text form; you could have multimedia packets with video interviews.

3. Enlist the endorsement of an influencer

You can take the route major brands choose and get an influencer to endorse your products. Influencer marketing does not involve large sums in exchange for testimonials from someone popular in your niche. Get an influencer in your niche to speak positively about your business. An endorsement like this will likely matter more to people who are in your space!

4. Display your numbers if possible

You can quickly obtain your business’ statistics from your marketing planning software. People are more comfortable when they’re not the first to try something; if you show that you have a sizable following who have already committed to your brand, it’s likely to bring in more customers.

Stating the number of enrollees you have for your course, the number of books you have sold, or the number of users your product has can translate positively on your sales.

5. Use pop-ups for social proof

Sometimes, you might see pop-ups in the bottom left-hand corner of a sales funnel page, or come across an opt-in page that lists who had recently bought the product or clicked into the website. These are called social proof pop-ups, and they show in real-time who is engaging with the sales funnel. 

You can use services by Proof, Provely, Morevago, ProveSource, and more to help you create this for your business website.

6. Emphasize media mentions of the business

Being featured on television still lends people credibility. As such, make the most of it and stress that your product has been in a TV feature. Make sure you put the logo of the outlet in your sales funnel, especially if you have videos or articles online about the media coverage.

7. Bring attention to awards it had won

No matter how small, an award can affect how people view a particular service or product. Having an award means you had met a level of quality that a panel of judges had deemed superior to its peers. Otherwise, people think, why would this product win? An award is a social proof that works double duty; it indicates both quality and popularity, so make sure you add them to your website.

8. Have partner or “used by” logos

If major industry players use your product in their operations, put their logo on your sales funnel. This practice enables you to look ‘credible by association’ and appear more confident. If your product has been featured on sales websites like Amazon, you should consider putting your five-star-rated customer reviews on your page as well. 

Like your business statistics, the number of industry peers using your product can be a factor when it is time to go back to your marketing budgeting software for a new campaign.

9. Consider oblique ways of gathering proof

When thinking about social proof, you should not limit yourself to direct evidence that the product is doing well. Social proof could also come from organic interactions with customers. 

You can still use the comments and leads generated during social media outreach efforts even if you cannot directly make money out of them. Also, connect your Facebook business page with embeddable widgets. Your opt-in pages could have plenty of ‘likes,’ but if visitors to your website are not aware of this, it would not matter much beyond Facebook. Allow social media to help your marketing by linking your website to this plugin.

10. Include trust seals and certifications

Customers feel better about online purchases when they know that they’re buying their goods from a company with a good reputation. Have your products certified by an independent third party, use secure systems, or have employees undergo training that leads to certification. When you display these ‘trust seals,’ you show that people should take your business seriously.

Conclusion

Businesses that want to leverage past success can do so in several ways. From including video testimonials on your website to show that your team has been certified for particular skills, make sure you include proof that you have had satisfied clients or customers in the past. Doing this ensures interest, at the very least, in what you can offer, and possibly convince people to download your app or sign up for your classes in the future.

Our marketing collaboration tool allows you to take care of all stages of the funnel; from mapping and planning to live analytics, we have you covered! Sign up for a free account today or get in touch with us to learn more.

Categories
Latest Posts Marketing Tips

10 Funnel Types for Effective Business ROI

The sales funnel is a traditional but reliable way to grow your business and extend your reach through conversions. A funnel works by nudging multiple entities into a paying position, similar to how it works in an physical funnel.

In marketing, funnel mapping and tracking can be done through software that allows capture pages to collect customer data and follow up to generate leads and conversions.

There are variants of sales funnels that each serve specific purposes, all of which are found on a funnel mapping software. These tools can be created through these marketing planning software products from a basic level to a more advanced system to generate larger scale conversions. Funneling can be your business’ best friend, and it has shown time and time again that these techniques work well to create better growth.

Types of Sales Funnels

These are basic sales funnels that can offer any enterprise improved conversion rates and a further reach on customers when implemented correctly.

Configuring these is easy with a funnel mapping tool to tailor-fit these to your tastes and needs.

1. Homepage Funnels

This funnel is about creating a standard home page and converting it into a lead funnel. The first page serves as the first impression for visitors. First impressions can have a lasting impact, and if your homepage does not tell the story of your business distinctly, people are less likely to purchase.

Cramming sign-up forms or other intrusive page elements and design can a hinderance for site visitors, so be subtle in the way you promote your business’ products.

2. Sales Letters

This funnel is useful in increasing value for your business. Sales letters come in the form of emails containing codes for discounts or future purchase incentives to get people excited to go back. Some people don’t think sales letters are powerful, but it is actually something that people look back at when they remember your business. Doing a quick search on their email mailbox will show them all emails from your company and will allow them to find the discount codes sent to them.

3. Squeeze Pages

Squeeze pages work towards obtaining email addresses of potential leads. Using things that spikes people’s interests like unique headlines, free offers, and attractive graphics can lead customers to sign up for newsletters and accounts. Curiosity is a large driving factor of modern-day sales, and people generally like to experience things for themselves. By giving them a reason to take an interest, they will likely convert.

4. Memberships

Membership funnels are a way to convert people into membership sites and paid service subscriptions. People are normally hesitant to part with their money, so giving them an option to try a product by signing up is a great way to generate potential conversions. Funnel mapping tools can help you create pathways and plans to link people with free trials to unlock full content for a set period.

5. Surveys

Survey funnels are often done to make visitors engage with your business and find out who your visitors are. This tool helps with conducting market research and finding better strategies for retaining clients or attracting more customers. Based on what demographic they fall under, funnel mapping software can help make messages specifically tailored to their group.

6. Lead Magnets

These funnels can retain clients, as this gives them a free item in exchange for signing up. Lead magnets can be used for a specific number of times per email address to prevent over-sharing material.

7. Hero Funnels

Sharing your business’ skillset and stories to visitors will allow a followers list to build up. The more relatable you craft your business to people, the more likely they will either promote or buy from your company. This funnel is an excellent opportunity to get more conversions and has better word-of-mouth marketing, which is free advertising for your business.

8.Webinar Funnels

Giving people a registration form that allows you to contact them and send meeting call join links is a great way to do outreach and gather better conversions. Webinars are a great way to sell larger ticket items, and make an audience more solution aware.

9. Ask Campaigns

This kind of campaign funnel shows what customers want before you create something for them. This funnel means using software to determine what piques people’s interests, which you can use to optimize your newsletters or outreach messages better.

10. Auto/Evergreen Webinars

These webinars that are pre-recorded and informative on specific subject matters can allow you to funnel visitors into your database. These auto webinars promote your products non-stop and enable people to choose the days and dates of when they want to attend or watch.

Building an Effective Sales Funnel

Sales funnels are incredible tools that allow growth. However, always approach your targets by using a strategy in any marketing funnel or campaign. When it comes to sales funnels, you will likely be investing in funnel building software, which means extra expenses for a business. Whenever money goes out in entrepreneurship, you will always want the best returns on investments. Otherwise, the money will effectively go to waste.

One of the most important aspects of sales funnels to start with is the homepage funnel, as this is where most people land when looking at your business. Having a well-designed and optimized homepage can make the difference between higher bounce rates and increased conversions.

Strategizing the methods used and the ways funneling will be conducted will be important in generating better conversions. By finding and applying the best practices to use sales funnels for your business and which ones can apply, you will enjoy the best ROIs.

Conclusion

Funnel mapping software can help in the overall marketing sphere of your business. By exploring all outreach methods and improving conversion rates, your company can operate more seamlessly and efficiently. Hire a professional’s services if you have no knowledge of effective funnel marketing and use the proper marketing budgeting software and tools.

For the best marketing planning software that can assist with various sales funnels and other marketing budgeting, visit MarketPlan for a new way to manage your strategies. Plan, execute, project, and tweak your campaign strategies all from a single software source.

Sign up for the free plan and start planning your marketing campaigns today!

Categories
Latest Posts Marketing Tips

The Importance of Automated Tools in Your Marketing Budget

A business can have all the goals it wants, but at the end of the day, a lot of the decisions that a company can make are limited by its budget. Smaller or budding businesses need to especially focus on this because it can take a long time for them to build a budget they can work with.

In short, finances are a limiting factor in all businesses, and the flourishing of a business depends on its ability to manage its income and expenses. However, not exceeding your budget does not guarantee success now or later or, either.

As a matter of fact, under-capitalization remains one of the most common causes of failure in new businesses. According to statistics from the US Bureau of Labor, only 80% of companies survive past their first year, and 50% of enterprises don’t make it past their fifth.

It goes beyond not spending beyond your means.

As such, it is vital to go beyond limiting your spending. A business should employ strategies that make the most out of every dollar spent.
One method of making sure a business’ operations fall in line with the budget is through automation & technology, especially when it comes to marketing.

Marketing is one of the most important aspects of any growing business, but more often than not, it is one of the hardest-pressed aspects of its operations. Not all enterprises have the budget to hire a marketing team, but this does not negate the need for meaningful advertising strategies for growth.

The concerns most businesses have

One thing is certain about customer interactions: they prefer a more authentic experience. They prefer responses that are personalized to their situation and inquiries.

Studies have shown that:

  • Personalized emails deliver six times higher transaction rates,
  • Personalized emails are more likely to be opened by up to 29%,
  • 79% of users say they are more likely to take up an offer if it was tailored to reflect previous interactions.

However, this might be challenging for a small business with neither the staff nor the technical know-how to handle the load of customer emails and social media interactions.

One option is to offer repeat customers new promotions and discounts on products or services related to their past purchases, and there are many other equally viable strategies.

How automated marketing can improve the customer experience

A customer’s data—their name, location, preferences, transaction history—can now be used to tailor their emails, increasing the likelihood of positive responses.

This capacity goes beyond email marketing, for example chatbots on your social media accounts can relay important information to inquiring customers.

The most commonly asked questions from customers can be written in and accounted for, giving them the right answers instantaneously, instead of forcing them to wait for a response from the person who manages the page.

You don’t have to dedicate an entire employee to answering all those inquiries, giving you more freedom to dedicate your manpower to more critical tasks. This can save you crucial time and money that you can use for growing your business.

Providing a fantastic customer experience is one of the ways you can make your business stand out in the market.

Research has shown that even a one-second delay in your website’s loading speed can cause a 7% drop in your conversions. A delayed response to a customer inquiry can result in even more dangerous drops and harm your branding.

One of the easiest ways to provide convenience and simplicity to your customers is through the automation of various processes and responses.

You can collect valuable data

Automation methods don’t just include the customer experience. Automated marketing tools can gather important data on customer behaviors.

It’s not just about gathering their contact information, but how they interact with your website and your marketing at various stages.

This is especially effective if your online sales strategy involves what is known as a purchase funnel, a system in which different marketing methods are applied to a specific lead, depending on what stage they are in their purchase.

The data gathered by your automated software can be used to identify your campaign’s strengths and weaknesses, allowing you to change and adapt your strategy as needed.

The best part of this is that it can be done in real-time. Any mistakes or missteps you’ve made can be corrected immediately, minimizing any negative blowback.

Beyond your website, automation can also be applied to your content marketing campaign—in particular, to your SEO content. Using data gathering tools, you can carefully take note of your website’s ranking on Google by using the relevant keywords.

In reality, you can use automated data gathering tools for literally every aspect of your marketing outside the qualitative. This information is the best way to gauge the success of any of your marketing activities.

Without understanding the data, your marketing strategy can be compared to putting messages in a bottle, throwing that bottle into the ocean, and hoping for the best. It is just aimless without any goals or strategies involved.

Automation platforms can help you gain understanding

The best thing about many of these modern solutions is that they compile all your relevant data and actions in a single platform. You could expect to understand the success of your marketing strategy by looking at one simple platform.

You might think that, by automating your marketing activities, you are relinquishing control of each piece. In reality, you are gaining greater understanding of your activities and strategies by compiling the data in one easy-to-understand location. It allows you to see the bigger picture and use this bigger picture to your advantage.

In conclusion

Having a smaller budget does not necessarily have to translate to having less oversight over the path your business will take. As long as you make smart choices and invest in the right marketing tools, you can get more value from whatever amount you spend.

That way, your marketing budget can yield better results, helping your business succeed in ways both measurable and immeasurable.

If you are looking for help with your next marketing campaign, send us a message at MarketPlan. We aim to help you make your agency or business as successful as it can be.

Categories
In-Depth Tutorials

Tracking Sales

Once you have all of your links from campaigns and funnels set up in MarketPlan, you can now begin to track your sales data. If you haven’t set up your campaign links, you can refer to the previous video in the series: Tracking and Links to learn how to set up the preliminary work for tracking using UTM’s.

Sales Tracking options

In MarketPlan we accommodate most any platform when tracking sales, ranging from simple to in-depth using what we call either the legacy or webhook tracking methods. Our webhook tracking method integrates with your funnel building, cart software, and payment processor to ensure that the sales data that MarketPlan tracks is actual money headed to your account.

No more false conversions because someone accidently hits the submit button a second time. Things like bump offers, one-click upsells, and multi product e-commerce sales, where data is grouped together will be more accurately handled by our webhooks tracking feature, whereas sales processes that are straightforward and simple can be setup in seconds using only the tracking code you have already installed on your pages, and your product information.

Let’s take a deeper look at how to setup your webhooks using both methods and add your product or service information for live mode analytics.

Setting Up Webhooks

In live mode, when you click on your sales icon, you will see the option to “Add New Method”, and this is what we referenced earlier with the different methods of tracking your sales depending on your specific situation.

The third option here “Universal” is perfect for marketers selling a large amount of products like E-Commerce retailers, who would realistically not go through one by one to setup individual webhooks for what could be hundreds of individual products.

MarketPlan can track all of the individual sales from all of your products universally to give any marketer the ability to choose how they track their campaigns.

Legacy

To get started, let’s select “Legacy” first off to show the easiest method or tracking and break that down. This is how you could set up tracking in seconds. When you select Legacy, simply title your product and enter in your product price. MarketPlan will automatically track your sales that come from that page to your confirmation or wherever you send your new customers.

Where this method has limitations is where you have dynamic confirmation pages, or multiple products on each page, MarketPlan will not be able to determine which product has been purchased and will fire off both or all of the products you’ve entered on the page, skewing your data.

Many do find success with Legacy. Especially for those who are selling one product at a time with a simple checkout process, this option can be a huge time saver, and is the simplest and easiest to set up.

Webhooks

In the case of this funnel we want to hook up a one click upsell to make more backend revenue out of the sales process. And so not everyone who comes from the sales page to the upsell is going to convert (however great that may be) with the one click upsell.

So when we go to setup the upsell product, in this case we would use the webhooks method if you don’t want to have multiple confirmation pages to keep your traffic separated. When we click webhooks, you will see this dropdown of different platforms we integrate with.

Once you pick your platform you will be provided with a webhook URL. Then just take your webhook URL and create a webhook inside of the platform you selected. Now whenever you get a sale, your platform will send that information to MarketPlan, ensuring you are always tracking the right product and the right quantities with precision. As long as you match the product name and price with the product inside your platform, MarketPlan will track all sales that happen in real time.

Next you’ll see the price override field. So let’s say our product or service is $1200. And to demonstrate let’s say that this particular product was an affiliate one-time consultant and you had a partner that you brought on board to handle the consulting calls for you and you know he is paid $300 for every call. You can take that expense into account by using the price override field to change the actual revenue MarketPlan tracks to be only $900, that way you get the most truly accurate ROI when compiling your campaign data.

Universal

The final and most advanced method for tracking is our universal webhook method. If you’re running an e-commerce store or any cart software where ten or more products are being sold on a page, the universal tracking method is the easiest way to account for every sale without having to set up tens and hundreds of products. Once you select the universal method, you now begin entering in the products you do not want to be tracked in the blacklisting fields, to get more precise data for your campaigns.

For example if you had an e-commerce store but had a few special products off to the side that you want to run special promos for and not to be lumped in with the rest of your sales, you can set those products off to the side by blacklisting them. And again you just need their exact product name and their price.

When you actually start making sales in your funnels, that campaign data will all appear here in the Webhook Notification Log as well and will look like this.

Conclusion

That is everything you need to begin tracking the sales for your whole funnel or campaign regardless of the product or service, price, or complexity of your marketing. Of course, if you do run into any issues at all or need any help we are just a couple of clicks away. Here at the bottom of your canvas, reach out to us. Our customer success team has experience working with many business types and situations. To ensure everything runs smoothly after setup, our next video focuses on testing your campaign, analysis, and optimization. So make sure to watch that next, but for now you are ready to track.

Categories
In-Depth Tutorials

Tracking and Links

Tracking your funnels and campaigns is an absolutely essential piece of making your marketing successful. But for those with limited experience in analytics or back-end work on a campaign it can seem very overwhelming to actually pull off, especially considering the amount of tech and knowledge of the analytics process that is required to successfully get the data from your campaigns you want.

But in MarketPlan we aim to simplify the whole process with a few key, easy to understand steps so, no matter who you are or what level of experience you have, you can track your campaigns and come out at the end with more understanding of your marketing, and more profitable campaigns.

In this video we will be going over the first steps in the process: Inserting Page URLs, Adding the MarketPlan Tracking Code, Creating UTMs, and Setting Expenses. So let’s dive right in.

Inserting Page URL’s:

On your MarketPlan canvas, once you’ve built out your funnel design, the next step is to put the actual URL’s of your campaign into the page elements, which you can do by simply clicking here on “Actual URL” and entering in your URL. This will be the page MarketPlan’s tracking code will search for when you install the actual tracking code into the header of your page.

Adding tracking code:

Next we will grab the actual code itself. If you have a Pro or higher plan you will have the option to turn this toggle to Live Mode, and You’re now in live analytics mode. and you’ll notice a dropdown that says “Tracking Code” appear. Simply copy this code and paste it in the header section of the pages you would like to track stats from.

Or, depending on the page creator you are using (WordPress, ClickFunnels, etc.) you may have the option to apply the tracking code globally, in which case you will not have to manually paste the code into every page. Once that is done, you will be gathering live stats from the pages you have selected in your campaign.

Something to note here is if you are using the same page URL in multiple funnels or campaigns, for instance if you have two funnels that both link to your main site at some point, you are able to stack the tracking codes inside your page header to track the same page in multiple plans inside of MarketPlan.

The next piece of your campaigns you can track is your links. In MarketPlan we use UTM’s, which are the industry standard in marketing for tracking links.

To ensure every piece of your campaign is coming into account, wherever your links may be whether its a button on a page, a blog post, emails, social media posts, YouTube video descriptions, affiliate links, MarketPlan is able to measure the performance of your links inside of your campaigns.

And as great as that is, there is one huge objection. And that is for anyone running campaigns or funnels for a while, whether it be for clients or for a e-commerce store or any experienced marketer, will know that they generate a lot of links. Are we saying that you will have to go through and painstakingly associate every single one of your existing links which could be in the hundreds or thousands now to MarketPlan just to track your campaigns?

Automatic Association

Fortunately the answer is no. And its because of a feature in MarketPlan called Automatic Association, where built into the MarketPlan lossless tracking code we automatically detect and track your existing UTM’s in your campaigns and the data from them appears right in the stats table in Live Mode.

So if someone comes in from a UTM not associated with your campaign, all you have to do is click on the unassociated UTM, and drag it onto the element of you campaign you want to associate with that UTM right on your MarketPlan canvas. And even if you don’t need it associated, MarketPlan will still track it so you can know all of the stats from it regardless.

Creating UTM’s

Another big part of tracking is creating unique links for your campaigns. This would be done in the traditional way by using something like Google’s UTM builder. But in MarketPlan you can contextually create UTM’s in every campaign app that you would use UTM’s for. So if you need to create links for your email sequence you can do it right from the email canvas app, same with blogs, social media, ads, and more.

Lets go into an ad module right here and create a link right inside of our campaign. Simply click the gear icon of an ad you want to track and click edit link. Since the ad is already connected to the page you want to send traffic to, when you select the destination URL, your already tracked page URL is right there for you to select. You then enter your campaign source, which in this case is Facebook. Campaign medium is flat rate ad. Name the campaign. No terms here because our ad isn’t keyword focused. Campaign content let’s say is Video 1.

Tracking Expenses

MarketPlan tracks expenses to account for your exact ROI with those expenses with these links at the bottom. So if you have existing UTM links that you auto associate into MarketPlan, you can go into those links and set up what the actual expense is for that link or that ad and match it to MarketPlan for accurate reporting. Creating links in app there are multiple options for calculating your expenses including the time frame and frequency of calculation. For example in most circumstances you would set the daily budget for each ad which could be something like $30, and then calculate that expense every day starting from the first time the ad is clicked onto the last time the ad is clicked, or in a custom date range. That way you can get an accurate ROI based off of your actual ad spend for each link.

Finishing Setup

Then click create and now your UTM link is successfully created and all that you need to do next is go into your ad manager, in this instance it was Facebook, and enter in this URL into this ad and ensure that the UTM you just created is there and tracks the data from that ad.

There is more to cover about tracking the rest of your campaigns including sales and how to analyze the data you receive, but we will cover those in the next videos. For now that is how to insert page URLs, add tracking codes, create UTMs, and set expenses inside of MarketPlan.

Categories
In-Depth Tutorials

Tasks and Collaboration

Some of the most advanced Features of MarketPlan are the team collaboration, task management and contextual conversation features. These features are the difference makers when it comes to marketing congruence and getting your campaign launched without a snag.

You see, most productivity and team collaboration apps out there are, well, a one size fits all solution. This usually means that each member of the team does the work and then updates their progress in the productivity software, leaving you the agency owner, project manager or marketing lead, just hoping it was done correctly.

Let’s face it, out of sight is out of mind. So when your campaign launches with a few hiccups and your process is not dialed to perfection, you lose out on the most critical stage of your launch and find yourself picking up the pieces and trying to make sense of what just happened.

Contextual Workflow

MakertPlan was created around the processes, tasks and assets real marketers work with every day. It is built so that each piece needed to make that campaign flawless is one click away and collaborated on in one single place.

Finally eliminate all that meaningless jabber and begin working, commenting and assigning tasks in real time on the assets your team is working on.

Canvas Apps

Each Page, Campaign App, Action App and Tool has a view button on it. In Live Mode this will show the traffic to and from the element and give real insight as to what is working and not in your campaign.

In Plan mode however, it reveals the actual marketing asset alongside the collaboration tools found on the right side. You can:

  1. Create tasks inside each canvas app
  2. Assign those tasks to a team member
  3. Comment on tasks
  4. “@” mention team members
  5. Write notes
  6. Create links
  7. Change task statuses

And more…

Canvas App Task Management

  1. To create a task inside any of the Canvas Apps, simply type the task into the bottom right task field and click “Add” or just hit the Enter key on your keyboard.
  2. To assign a task to a team member, click the triple dot menu on the right of the task and then select the assign to dropdown and select your team member from the list.
  3. To change the status of the task, click the triple dot menu on the right of the task and then select the “Move To” dropdown and select the Kanban lane you would like to move it into. (Kanban Lanes can be customized for your own processes.)
  4. To delete a task, click the triple dot menu on the right of the task and then select the “Delete” option from the dropdown.
  5. To rename a task, simply triple click the text on the task and start typing.
  6. To create subtasks to the task, click on the task and the menu for subtasks and comments will pop out. Type your subtask into the subtask field and click the “Add” button or just hit the Enter key on your keyboard.
  7. To assign a subtask to a team member, click the triple dot menu on the right of the subtask and then select the “Assign To” dropdown and select you team member from the list.
  8. To mark a subtask as complete, click the triple dot menu on the right of the subtask and then select “Mark As Done
  9. To delete a subtask, click the triple dot menu on the right of the subtask and then select the “Delete” option from the dropdown.
  10. To rename a subtask, simply triple click the text on the task and start typing.
  11. To comment on a task, click on the task and the menu for subtasks and comments will pop out. Type your comment into the comment field and click the “Send” button or just hit the Enter key on your keyboard.
  12. To mention someone in your comment on a task, just type the “@” symbol into the comment box and a list of your team mates will come up. Select the team mate your want to mention and after leaving the comment click the “Send” button or just hit the enter key on your keyboard.
  13. To write notes inside the canvas app, look for a button called Notes and click it. This will bring up the writing space for that app.
  14. To chat with your team while inside of the canvas app, click on the chat icon on the left of the taskbar.
  15. To minimize the task bar and view the canvas app full screen, click on the arrow on the left of the taskbar.

Progress Visualization

Now here is where things begin to take shape in a revolutionary way. On each asset placed on the Canvas that has tasks, there are two visual representations signifying the progress of each asset.

  1. The percentage completed counter allows agency owners and project managers to know how far each asset is progressing and when completed, each Canvas App will have a checkmark in place of the percentage counter. This will allow you to sign off on every asset and once you have checkmarks everywhere… It’s launch time!
  2. For each team member, MarketPlan will display a red notification on the top left of every element that has a task assigned to them or unread comment with their “@” mention on those tasks.

These are very highly effective signifiers that will help you stay focused on what needs your attention inside of every campaign you build and launch.

The Kanban

Collaborating right on the marketing assets you are creating and implementing is a game changer but what if you don’t want to keep jumping in and out of each made for marketing app? Let’s go to the Kanban to get the 30,000 foot view of all of the tasks for this campaign.

When you click the Kanban toggle on the top right on the screen, the Kanban will overlay over your plan.

Now this is not just any old drag and drop card based Kanban… This is a fully searchable, filterable, custom lane Kanban with a timeline built in for unprecedented task planning and dynamic team management.

  1. To live search for a task, just begin typing into the search field on the top right of the Kanban interface.
  2. To create a task, you can either click on the plus icon on the top of each lane or just drag the “Drag New Card” button into any lane and drop it in place.
  3. To add a Kanban lane, click the plus icon in between each lane in the location where you want the lane to show up.
  4. To change the color of each Kanban lane, click the triple dot menu and select the color you would like that lane to be from the drop down list.
  5. To delete a Kanban lane, click the triple dot menu and select the “Delete” option from the drop down list.
  6. To move a card into a new status lane, just click and drag anywhere on the card and drop it into the desired lane.
  7. To edit the title of a Kanban card, triple click the title on the card and start typing.
  8. To edit the description of a Kanban card, triple click the description are on the card and start typing.
  9. To change the color signifier for for a Kanban card, click on the colored square on the top right of the card and select the signifier from the dropdown list.
  10. To assign the task to a teammate or client, click on the member icon and select the desired team member from the dropdown list.
  11. To duplicate a card, click on the duplicate icon on the top right of the Kanban card.
  12. To view cards assigned to specific members, click on each team members profile and the Kanban will filter each of the cards to show only cards belonging to the team members you have selected.
  13. To bring up the task details, just click on the card. Here you can edit the title, edit the description, add subtasks and comment on the card.
  14. To jump into the mini app associated with a card, click on the “View” button on the bottom of each card that is associated with a Canvas App.
  15. To set a due date for a task, click on the watch icon on the bottom left of each card and after setting the date click save.
  16. To edit your card on the timeline first set a due date and then head into the timeline. Once on the timeline you can drag the start and end dates as well as edit and assign the card as needed.

With MarketPlan’s collaboration tools, you now have all you need to manage your team’s work, know what you need to do in each plan, and leverage powerful features that can help you get to market and launch, crossing every ‘t’ dotting every ‘i’ and along the way.

Categories
In-Depth Tutorials

Canvas Action App

MarketPlan’s Action Apps allow you to visualize multiple components and actions in your plan to give the complete picture behind the flow of your marketing campaign for your team or for your clients to easily understand every step of the plan.

There are four Action Apps for you to use on the canvas in MarketPlan.

Tag

First, is the Tag Action.

The Tag Action lets you indicate where in the flow of your campaign that a prospect should have certain tags added or removed within your autoresponder or CRM.

This is a useful reminder for your team or clients on what tags are involved to maintain organization for their back-end operations.

To use this Action App, simply enter the title of the tag that should be added or removed and click on “Add Tag” or “Remove Tag” to save it in the quick-list below.

The tags that need to be added to the prospect show with a green plus and the tags needing to be removed show with a red minus symbol.

While this does not actually perform the action from within MarketPlan yet, the Tag Action does give a clear visual and understanding for your team or clients to follow.

Condition

The second Action App is the Condition Action.

The Condition Action represents a point in the campaign flow where a prospect only proceeds if a particular condition is met.

You can write that condition in the title of this Action as well as customize your own icon and color for visual appeal and coherency in your plan.

While this does not affect Live Mode analytics, it does give a clear visual representation of what is going in in the flow of the campaign.

Wait Timer

Thirdly, is the Wait Action, which allows you to visually specify a period of time that your prospect will be delayed from proceeding to the next step of the campaign.

You can choose a time from hours all the way to years as you make clear visual cues for your team or clients to understand the flow of your plan.

Custom Action

And lastly, is the Custom Action App which lets you create your own action with a custom title, icon, and color as a visual representation of your custom action in your plan flow on the canvas.

The Canvas Action Apps help give clear communication to your team on what components of your plan are taking place as well as provide simple visuals to give quick understanding to your clients as you give pitches and presentations of your marketing plan to help close client deals, maintain relationships, and speed the of productivity for your marketing agency.

Categories
In-Depth Tutorials

Task Canvas App

The Task Canvas Tool inside of MarketPlan is a flexible tool that gives you a clean and open versatile text editor with the ability to create and assign tasks for your team.

The color and icon drop-downs give you customizing options to create unique elements on the main canvas to give better visualization of your complete marketing plan.

The full text editor lets you:

– Quickly save important notes about your campaign

– Store miscellaneous copy or content used in your marketing such as:

– Video scripts

– SOP’s for your team

– And so much more.

This gives you and your team a quick way to collaborate on pieces of your campaign that may not be directly related to one of the other Canvas Apps to keep all of your tasks organized and having a home.

Useful Canvas Tools such as the Task App gives you greater flexibility in producing complete marketing plans that your team or your clients can quickly understand all that’s going on for effective client communication and team productivity.

Categories
In-Depth Tutorials

Social Plan Canvas App

The Social Plan Canvas App inside of MarketPlan allows you to bring all of your social media pages into one simple area that you can create and assign to-do’s with each to collaborate with your team.

Now there are 4 key components of what goes into effective social media campaigns.

5 Key Components

1. Firstly, a well-thought out content strategy.
2. Secondly, producing quality content for that strategy.
3. Creating and managing your links,
4. And, lastly, tracking and optimizing your posts.

Normally, it can be a hassle to keep up with all of your social media channels for your team or clients where consistency is critical.

But with MarketPlan’s Social Plan App, you have a simple way to view and collaborate on each of your social media pages and have a place to keep each of your team members or clients accountable to maintain effective social media marketing content strategies.

Let’s hop inside of MarketPlan and see how this works.

Getting Started

In this mock-up plan we are leveraging various social media channels to be able to promote webinar content that turns into blog posts which qualify traffic for our sales funnel on the back end.

Let’s go over our social plan here inside the Social Plan Canvas App
we’re able to bring all of our various channels to one place for your team or clients to work on.

Here we can begin with the first component of social media campaigns which is the content strategy.

Content Strategy

Here at the top right we can enter our growth goal which is to engage our prospects with video content.

With this goal in place the entire team is able to stay focused on this objective when managing social media content.

Down below we have a mini canvas for you to plot out all of your various channels.

Let’s go ahead and add one more.

With this other block we’re able to specify a social media channel that may not be already listed here on the left such as Reddit.

Each of these social blocks give you a quick way to link over to your
social page.

You can specify that page URL right here.

This gives your team or clients a quick way to navigate to each of your social media pages to be able to collaborate and produce content, which brings us to the second component of effective social media campaigns:
quality content production.

Content Production

With the task area here on the right you’re able to create tasks and delegate each of the components of your content creation for each individual social block, giving you an effective way to organize the implementation of your marketing content strategy, and you can have the right team member doing the right task to produce your content.

Once that content is created it’s important to leverage the third component of social media campaigns which is to create and
manage your links.

When you hover over a social block you’ll see the links option here at the top.

Upon clicking, you have the ability to create all your various UTM’s for that particular social page.

As you can see in this example, we have a link to each of the webinars that we produce inside of the Facebook group, giving a quick way for the team to be able to access these links in an organized manner.

For more details on how to create and manage links we have a dedicated video inside this playlist.

With your links grid we can focus on the fourth component of effective social media campaigns which is measuring the performance of your various posts and optimizing them.

Measure & Optimize

When you have your links set up, whichever links point to particular
pages inside of your marketing plan you’ll be able to review the performance of each of those links so that you can see what converts and what doesn’t in either your content or your copy.

Here’s an example campaign where we already have some stats tracked.

When you flip over to live mode and view your metrics you’re able to see the traffic from each of the links from your social plan as well as your other links to be able to quickly compare the performance and optimize your marketing strategy from key metrics such as ROI and more.

The MarketPlan Soical Plan Canvas App allows you to keep your team and your clients accountable and on the same page for effective social media management and engagement.

If you have any questions at all in leveraging these tools inside of your MarketPlan account, check out our help menu in the bottom right where you can view more tutorials or contact our team.

Categories
In-Depth Tutorials

Notes Canvas App

The Notes Canvas Tool in MarketPlan is a simple tool that gives you a clean and open versatile text editor with the ability to create and assign tasks for your team.

This allows you to:

– Quickly save important notes about your campaign

– Store miscellaneous copy or content used in your marketing such as:

– Video scripts

– SOP’s for your team

– and so much more.

The task area gives you and your team a quick way to collaborate on pieces of your campaign that may not be directly related to one of the other Canvas Apps to keep all of your tasks organized and having a home.

Useful Canvas Tools such as the Notes App gives you greater flexibility in producing complete marketing plans that your team or your clients can quickly understand all that’s going on for effective client communication and team productivity.

Categories
In-Depth Tutorials

Keyword Planner Canvas App

The Keyword Planner Canvas App inside of MarketPlan allows you to compile and organize your keyword and phrase search data as well as budget, measure, and scale your search ads for effective search engine marketing campaigns.

Now there are 4 key components within the process of implementing keyword search strategies.

4 Key Components

1. Firstly, research and organize your keywords and search data,
2. Then with that data, develop your search advertising strategy & budget,
3. Create and manage your links,
4. And, lastly, measure each keyword’s performance and optimize.

Normally this process lives separately, away from the rest of your marketing assets and can get unorganized very quickly.

But with MarketPlan’s Keyword Planner App, you can compile all of your keyword research data in one place for at-a-glance reference as you work on other components of your campaigns. Additionally you can see the performance of each keyword in respect of your whole campaign, allowing you to grow and manage effective keyword search marketing strategies.

Let’s go into MarketPlan and see how this works.

Getting Started

So here we are at the simple blog marketing plan where not only will we be implementing keyword strategies within our blog posts, but also implementing keyword strategies within paid search campaigns.

So let’s jump into the keyword planner.

When you’re brought into the keyword planner you’ll see at the top the option for you to enter in your purpose.

For us it’s to drive block engagement this helps your team and clients stay
focused on what’s being researched and what keywords are actually being
compiled so that no vain keywords are brought into the mix.

Here on the right you have the task area to be able to delegate the components of your keyword campaign.

Here on the left we have the keyword list which allows us to organize all of our researched keywords, which brings us to the first component of keyword strategies that is the keyword research side of things.

Keyword Research

Normally this task is handled in a separate spreadsheet far away from the remainder of your marketing assets and a lot of times it’s even delegated to a dedicated SEO specialist or a virtual assistant.

But with MarketPlan’s Keyword Planner Canvas App, you can delegate this
task to whoever is skilled in your team or for your client to compile the
necessary keywords for your strategy.

Let’s go ahead and fill in a few keywords.

With the multitude of keyword research tools out there you can simply bring the highlights of that data into MarketPlan.

Here we can enter the average monthly search volume as well as the competition for the keyword.

Let’s bring in a couple more keywords.

Now with that data we can move on to the second component of keyword campaigns which is developing your advertising
strategy and budget.

Budget Creation

The keyword planner app lets you do this by allowing you to enter in the low and high bid values that your team or your client would agree on with you.

Let’s enter in a few values.

Now with the budget finalized let’s move on to links the third component of a keyword marketing campaign.

For each keyword you’re able to store listed links so that you would use
inside of your search ads.

To learn more how to create and manage links using the MarketPlan link tool we have a video inside of this playlist going over the process.

As you create your links you’re able to set your actual expense that you’ll be
setting for your budget inside of your search advertising platform such as
Google.

MarketPlan gives you the ability to set a daily, monthly or even a one-time expense for your particular marketing budget.

This allows you to get accurate ROI numbers when you’re reviewing your stats and with your link created and stored inside MarketPlan, your team with one click can grab the link here for accessibility and organization.

When you’re ready to launch your search ad campaigns the Keyword Planner Canvas App gives you the option to toggle whether or not this keyword is shown as live.

This gives you a simple visual indicator for your team or your clients
to know which keywords you’re actively bidding for.

With your keyword search ads live let’s discuss the fourth component of
implementing a keyword search strategy which is measuring each keyword’s performance. and optimizing them.

Measure & Optimize

With each of those links tracked inside of live mode you can review this plan’s metrics in real time and compare the flow of prospects from each keyword throughout your campaign.

Let’s review a mock-up plan where we have some stats already loaded in.

When we review the keyword traffic going throughout the campaign we see that the ROI is 120 for this particular source.

If we click on the individual ad or the source we can see how that traffic relates throughout the entire funnel.

For this plan the lower price item was actually preferred by traffic however more revenue was gained by the higher price item.

At a glance you, your team, or your clients can quickly make actionable marketing decisions with this information.

If you have any questions though about implementing the Keyword Planner Canvas App inside of your marketing campaign feel free to access our tutorials or our customer success team here.

Categories
In-Depth Tutorials

Email Canvas Apps

The Email and Email Sequence Canvas Apps in MarketPlan allow you to finally have one place to create, write, link, and optimize the most effective emails for your clients, leads, and prospects.

4 Key Components

Now, there are 4 key components that go into the process of crafting an effective email campaign:

1. It is firstly strategize and create a logical flow for your prospects,

2. Once you have that logical flow, then write targeted copy,

3. Next is to create and manage your links,

4. And, lastly, to measure the effectiveness of each email to optimize and scale the campaign.

Normally, this process looks like a jumbled mess to actually launch and manage an email sequence,

But with MarketPlan’s Email Canvas Apps, we simplify this process and let your team or clients work on your sequences in one easy-to-understand place so that you can create successful email marketing campaigns.

Let’s go inside of MarketPlan see and how this works.

Getting Started

So here we are with an e-commerce campaign where the storefront is gathering leads to subscribe boxes and we’re taking those leads and offering them a 72-hour 30% off promo for a dedicated product.

Going down the funnel here you see that we have an email sequence canvas app and a single email canvas app involved within this plan.

The difference between the two is that the email sequence has multiple emails and a visual builder for you to plan out the flow of that campaign, as for the individual email canvas app just has one simple email pointing to wherever necessary inside of your canvas flow.

So let’s start off with the email sequence canvas app and see how MarketPlan helps you build out email campaigns fast.

Plan Sequences

Firstly you have the visual builder over here that allows you to plan out your entire email sequence for you or your clients to be able to
quickly view exactly what’s going on with the necessary condition and action triggers over here to be able to convey exactly what is going on inside of your autoresponder.

While MarketPlan may not be directly performing these actions in your autoresponder, it does give a very clear visual cue so that everyone is able to stay on the same page when collaborating within this campaign.

So in the sequence we haven’t quite finished out the entire sequence yet and we’re going to go through together finishing out the sequence so you can see all the features that are available within this canvas app.

Firstly when you start off with an email sequence canvas app and market plan you want to ensure that you title the sequence how you want it to be represented on the canvas and you also want to enter your purpose here at the top right of this email sequence so that whoever is collaborating on any of the components of this email sequence understands very quickly at a glance what the core focuses are of this campaign.

This one is to push sales for the limited time promo so that if anyone who is copywriting, producing graphics, or any other task inside of here they have that directly at a glance so that their mind is in the right frame when producing marketing assets.

Down below we have the ability to not only visually plot out the campaign but store the copy for each of these individual emails by clicking “Edit”.

Over here we can see this first email with copy we already have saved inside of this.

Now let’s go ahead and finish plotting out this whole campaign because this is a 72 hour promo.

I want to enter one more email over here for the last day of this sequence
so let’s drag in a new email from the top and the title for this email is internal so I’m going to title it so that everyone knows what the theme of
this email is, and this is the urgency email.

Now I’m going to follow up this email with the necessary actions for the remainder of the sequence. If no one purchases this particular product within a day after this email sequence I want to go ahead and move them over to my content drip so I can continue to nurture the prospect down the line.

So let’s go ahead and drag in an action and let’s set the wait time for one day, and now I’m going to grab a condition and bring it below that and say “If No Purchase” I’m going to drag another action and say “Then Move to Content Drip”.

And now with this we have a very clear visual map that even your clients will be able to see exactly what’s going on with this email sequence so that not only is there marketing congruency in the asset production, but a very simple at a glance knowing exactly what’s going on with the plan whenever you’re making pitches or giving quick presentations.

If you look over here on the right we have the task area which allows our team to be able to collaborate on each of the marketing assets.

As you can see for our workflow, we simply made a task here at the bottom for each email that’s inside of the sequence.

Here inside of email three we have subtasks for every single component involved within the email.

As we can see the copy is assigned to me over here so let’s go ahead and work on this copy.

Write Copy

By clicking edit we’re going to go ahead and go directly inside of the editor for this particular email and what we’re brought to is a very clean white clear canvas for anyone who is copywriting to have a very clear frame of mind to be able to produce excellent high converting copy.

To get started let’s go ahead and enter the subject of this particular email and then let’s also put in the purpose here at the top right.

Likewise for the entire email sequence where we have the purpose there we’re going to put in this particular purpose for this email so that the copywriter and anyone else working on components this email can stay very targeted in their messaging and asset production.

And here we have to drive conversion urgency so I know whenever I’m writing the copy of this email that I’m going to focus on driving that and I can minimize and consolidate my copy to produce an effective email.

Let’s go ahead and write that copy together right now so that whoever is actually plugging up this email within our autoresponder is going to be able to see exactly what needs to be bolded and what is the headline.

Let’s click save here at the top right and now we have this copy stored inside of MarketPlan for the future if we ever need to reference this copy again, giving a very clean and fast way for anyone to be able to quickly view and manage resources for all of your marketing assets.

Now we can go ahead to that subtask and check it off as complete.

Now for the next part of the email marketing process we want to ensure that we have our links ready to go.

So clicking the links area here at the right we’re going to be able to create UTM links that go inside of this email so that we can measure and track later on and have that information directly available from within MarketPlan for everyone to review and work with.

Now if we go ahead and go back up we can go to the very first email where we already have one link created.

When you click link right here we have the quick easy copy button for us to be able to copy this and bring it right into the autoresponder for whoever’s launching the campaign.

You can create multiple links per email if you want to measure the performance of let’s say a button that’s at the top of the email versus at the bottom.

Also we have the live toggle over here which just a simple indicator of whether or not this email is actually live in the sequence.

This gives a clear distinction between what is still under production and what’s actually ready to go giving your team or your clients further clarity and understanding what exactly is going on with the campaign.

Now let’s go ahead and check out the single email that we have within this marketing plan here at the checkout page.

If anyone abandons the checkout, we have this abandoned email sending traffic right back into the checkout for conversions so with this we’re not really doing a sequence but an individual email therefore we’re using the individual email canvas app.

Here we can go ahead and title the email at the top and we can manage our links here at the right.

Right down here below is the same text editor that we have for the email sequence canvas app for you to store and collaborate on your copy.’

Likewise we also have the same task area that’s available to you for your team to be able to delegate the necessary components of this email.

For the email app you can choose a custom icon and color for this particular module so that when you come back to the campus you can have a specific color and icon so that you can customize the look and feel of your plan so that it makes the most sense for you and or your clients.

Now let’s go over the last component of email marketing which is to measure and optimize the performance of your emails that you created.

Measure & Optimize

With your links in live mode set up, as soon as traffic goes through those links you’ll be able to track what happens to your prospects in real time.

To give you an example on how to make decisions from those stats I’m going to go ahead and show you a campaign that we ran for MarketPlan a little while back.

A little over a year ago we launched live mode into MarketPlan.io and we ran this email sequence to two particular segments within our internal list.

Let’s go ahead and look at the live mode stats for this particular sequence, and we’ll flip to “All Time” and we’ll be able to see over here a few emails that we sent.

We had five emails in this particular email sequence and we can see that email number four had the highest amount of revenue, and email number two had the lowest amount of revenue.

Now knowing these numbers I can go ahead and look at the actual emails themselves in plan mode and see what difference actually was taking place between email four and email two.

We can also click on the stats icon on the right and see what the particular conversion rate and earnings per click is for each of these two emails, and if we look at email two we’re looking at one percent and a little bit less than four dollars for the EPC.

So as you can see this is a quick and effective way for you to
measure and optimize your campaigns not only for you, but for your clients as well to see exactly the story that is going on behind your marketing plan.

With MarketPlan’s Email Canvas Apps there’s finally a home for your email marketing process so your team or your clients can work on your sequences in one simple place to create successful and effective email marketing campaigns.

Categories
In-Depth Tutorials

Custom Media Tool

The Custom Media Canvas Tool in MarketPlan is a unique tool that allows you to load external web-pages, tools, and content directly inside of the canvas so your team can not only view that content, but assign tasks and leverage MarketPlan’s team collaboration features.

This gives you flexibility in your workflows to dial in productivity with your team as well as be able to provide a premium planning experience for your clients.

To get started with the Custom Media Canvas Tool, simply edit your label that appears on the canvas for this element and enter in the URL of the external content you want to load up inside of MarketPlan.

A few use cases for this are incorporating spreadsheets or documents in your campaign with google services, linking file storage services such as Drive, Dropbox, Rethink, or S3 for your team or clients to be able to access necessary files for your campaign, video links for your team to edit and review media under production or even to post a video for your clients to watch to present their marketing plan.

With the notes area in the corner, you also are given a full text editor that lets you quickly save important notes about your campaign, store copy or content used in your marketing such as video scripts, SOP’s for your team and so much more.

Use the Icon and Color Picker to customize the element as it appears on the canvas for even further fine-tuning of your end-plan experience for your clients and for your team.

Lastly, with your team or clients, collaborate on the components you add with this tool by adding and assigning tasks as well as commenting on what is needed for you manage and execute on effective marketing plans with MarketPlan.io.

Categories
In-Depth Tutorials

Chat Canvas App

The Chat Sequence Canvas App inside of MarketPlan allows you to visualize and create as well as measure and optimize effective chat-flows for your bots or sales and support team to build sequences that convert your prospects throughout the customer journey.

4 Key Components

Now there are 4 key components that go into the process of creating and managing effective, high converting chat sequences:

1. It is firstly to strategize and create a logical flow for your prospects,

2. Once you have that logical flow, then write targeted copy,

3. Next is to create and manage your links,

4. And, lastly, to measure the effectiveness of your messages to optimize and scale the sequence.

Normally, this process becomes unorganized and chaotic with each of your sequences not being easy to review in most chat-bot apps and also with keeping chat-flows and links for your or your clients’ sales and support teams easily accessible when converting prospects.

But, with MarketPlan’s Chat Sequence App, this process is made simple by bringing all of your messages and flows in one easy-to-understand place, to see how your messaging relates to the bigger marketing strategy

Let’s go into MarketPlan and see how this works.

Getting Started

Sowith this mockup we have an e-commerce campaign where we have two points of chatbot interfacing with our prospects.

In the beginning of the flow on the Facebook side of things we have a Facebook chat bot hooked up and on the storefront itself we have an integrated sales widget where our support and sales team is accessible via both of these chat messengers.

Let’s go into this chat sequence to see a built out flow.

When you’re inside the Chat Sequence Canvas App you’ll see at the top the title that’s represented in the canvas and also your purpose behind this sequence.

Down below you map out the flow of the campaign similar to how you would for the email canvas app with the full MarketPlan text editor for each message.

Here at the right you have the task area to properly delegate and collaborate with your team or your clients on each of the components involved in the chat sequence.

Let’s go ahead and build a chat sequence from the bottom by using the Facebook chat bot that we have planned out over here.

Let’s start off by entering the purpose of this particular chatbot sequence and that’s to direct traffic to our store and offer customer support.

And now let’s go through the first component of creating and managing chat sequences which is to strategize and create a logical flow for your prospects.

Create A Logical Chat Flow

The chat sequence canvas app gives you the ability to plan this out using various messages, conditions, and action tags that you can simply click and drag down.

Now the start of the sequence is when a Facebook page visitor clicks on the get started button at the top of the page and we can indicate that here.

From there on Facebook they’re presented with a short message and a menu, and that’s what we’ll use this first message block for.

And in that menu we’re going to be directing prospects either directly to the store or to contact us, so to link prospects to the store let’s add another condition for “if clicked: view current sales” and we’ll use an action indicator to follow after that to notate that we would be linking them to the clearance page of the store, and now I’ll build out the rest of the flow

And with all this plotted out the chat sequence canvas app gives you the ability to visually represent the flow of your chat sequence campaigns so that everyone can easily understand what exactly is going on across all your various tools.

So to avoid your team or your clients having to log in multiple platforms to explain the strategy you can simply direct everyone’s attention to MarketPlan to get a quick understanding with our task area at the right.

Let’s go ahead and go through the first one which is to get our copy created which brings us to the second component of producing chat sequences which is to write targeted copy.

Write Targeted Copy

So let’s click on the edit button and get inside of the text editor.

When writing a message it’s important to state the goal of the message so whoever’s producing the copy can stay targeted and focused in their language.

Now the goal of the main menu would be to welcome our prospects and to direct them to the sales team or to the store.

Now let’s go ahead and write out what we’d want the initial welcome message to say.

Now with the copy created the notes made for the remainder of the team for where all the links need to go, we can go ahead and click on “Save” which brings us to the third component which is to create and manage our links.

For our messages the chat sequence canvas app gives a very easy way to organize all of your links.

By simply clicking on the links button you’re able to access the link menu where we can go ahead and generate the UTM links for each of the different menu options that link to our site.

For more detailed breakdown of the links area we have a dedicated video inside of this playlist.

You can create as many links needed for each message.

By clicking “Copy Link” your team has full access to each of these UTM’s to ensure you have everything that you need to track the performance of your messages.

With the copy and links created we have what we need to get started launching the sequence.

When you finally have your messages running live on your page or within your support team you have the live toggle here to give a simple visual indicator of knowing which messages your prospects are actively seeing and which ones are still under production.

With everything launched let’s go over the fourth component of managing chat sequences which is to measure and optimize each message in your sequences.

Measure & Optimize

With your links configured you’ll be able to see which prospects came from your chat messages and see which chat messages lead to more conversions so that you can optimize your copy and marketing strategies.

All in all the MarketPlan Chat Sequence Canvas App allows for simplicity and productivity in producing effective chat campaign.